
Freebie SVG
3 Meaningful DIY Projects for Teachers – Thoughtful Gifts They’ll Truly Love
3 DIY Projects for Teachers
Create Amazing Classroom Decorations, Custom Shirts, and Personalized Coffee Mugs
Total Time: 2-3 Hours
Budget-Friendly
Perfect for Back-to-School
Welcome Back to School, Amazing Teachers!
As educators, you pour your heart into creating inspiring learning environments for your students. This back-to-school season, why not add some personal touches that reflect your creativity and passion for teaching? Today, we’re sharing three fantastic DIY projects that will help you customize your classroom and teaching wardrobe while staying within budget.
These projects are designed with busy teachers in mind—they’re quick, affordable, and require minimal crafting experience. From a welcoming classroom display to a personalized teacher shirt and a custom coffee mug to fuel those early morning lesson plans, each project will add a special touch to your teaching journey.
Classroom Welcome Board
Create a stunning welcome display that greets students with warmth and creativity.
Custom Teacher Shirt
Design a personalized shirt that showcases your teaching pride and personality.
Personalized Coffee Mug
Craft a custom mug that makes your daily coffee break extra special.
1
DIY Classroom Welcome Board
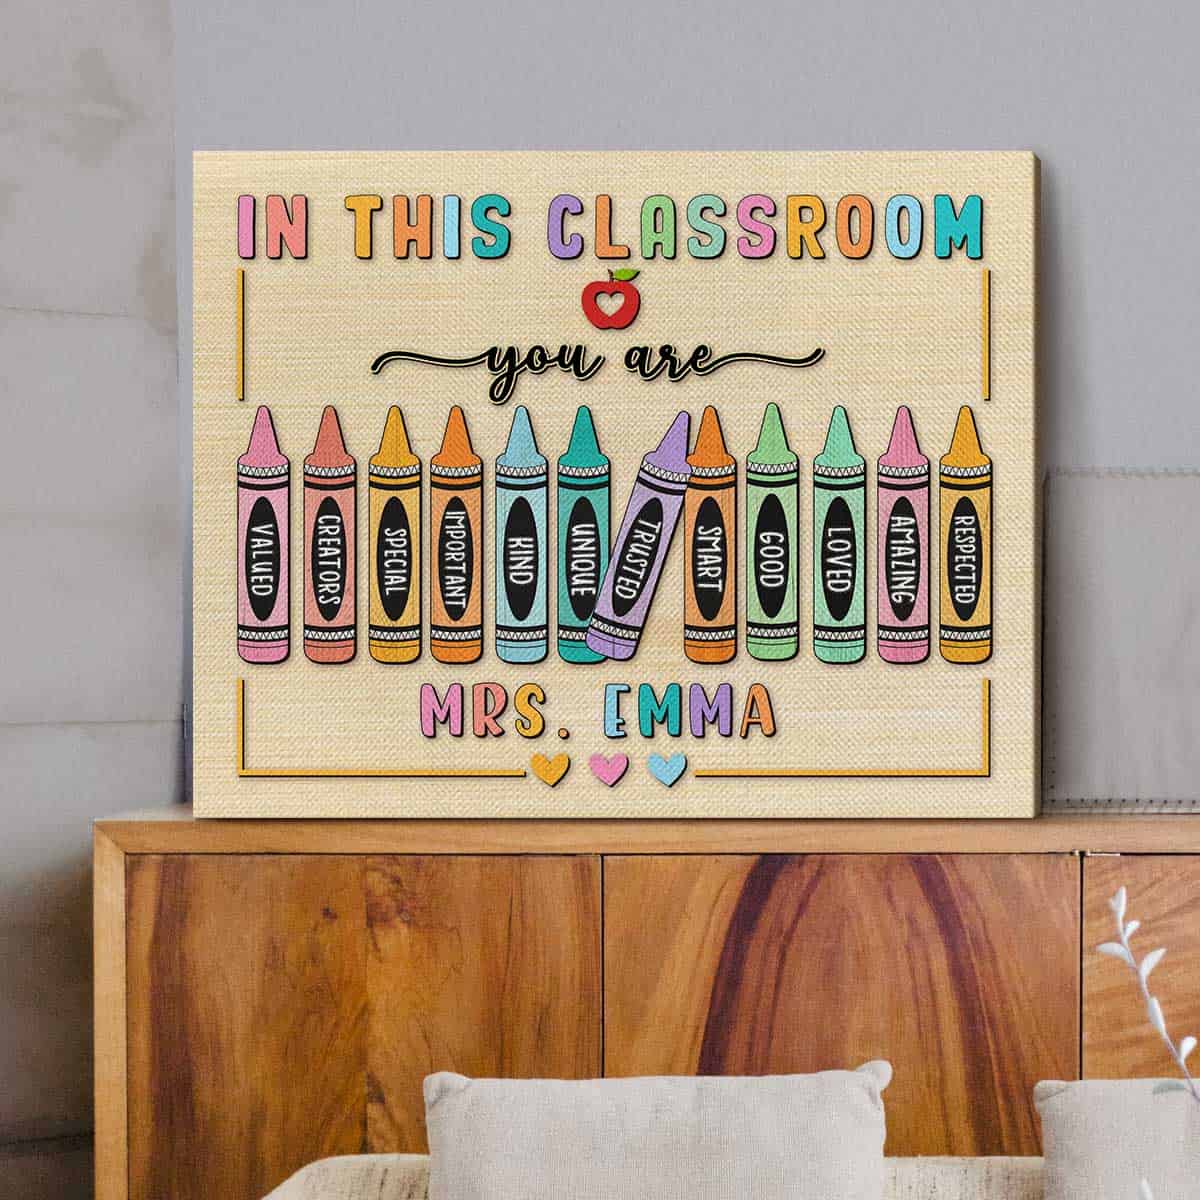
A warm welcome board sets the tone for your entire classroom. This project combines creativity with functionality, creating a display that can be updated throughout the year while maintaining a cohesive look that students will love.
Pro Tip
Using back-to-school SVG designs can give your welcome board a professional, polished look that’s easy to customize!
Materials Needed
Base Materials
- Large poster board or foam board
- Colored cardstock or scrapbook paper
- Laminating sheets (optional)
Design Elements
- Faux boxwood panels or greenery
- Wooden letters or vinyl lettering
- Decorative border strips
Tools & Supplies
- Hot glue gun and glue sticks
- Scissors or craft knife
- Ruler or straight edge
Step-by-Step Instructions
Plan Your Design
Sketch your welcome board layout on paper first. Consider the size of your display area and choose a color scheme that matches your classroom theme. Browse SVG designs for inspiration and professional-looking elements.
Prepare Your Base
Cover your poster board or foam board with background paper or fabric. For durability, consider laminating the background or using peel-and-stick wallpaper that can be easily updated.
Create Your Welcome Message
Cut out letters from cardstock or use vinyl lettering to spell “WELCOME” or your chosen greeting. For a natural look, attach faux boxwood panels as a backdrop and use wooden letters in a contrasting color.
Add Decorative Elements
Layer decorative borders, shapes, or themed elements around your welcome message. Use hot glue to secure everything in place, working from the background forward.
Mount and Display
Secure your completed welcome board to the wall using removable mounting strips or push pins. Position it at eye level for your students and in a location where it will be easily visible upon entering the classroom.
Expert Tips for Success
- Budget-Friendly Shopping: Visit Dollar Tree for white storage tubs and basic supplies, then add personality with colorful accents from thrift stores.
- Seasonal Updates: Create interchangeable elements so you can update your welcome board throughout the year without starting from scratch.
- Student Involvement: Consider leaving space for student artwork or photos to make the display more personal and engaging.
- Durability: Use foam tape or hot glue for permanent attachments, and velcro strips for elements you might want to change.
2
DIY Custom Teacher Shirt with Vinyl

Show your teaching pride with a custom shirt that’s uniquely yours! Using heat transfer vinyl and a Cricut machine (or even just an iron), you can create professional-looking teacher apparel that rivals store-bought options at a fraction of the cost.
Design Inspiration
Explore our collection of teacher SVG designs for ready-to-use graphics that will make your shirt stand out!
Materials Needed
Cutting Materials
- Cricut machine or craft knife
- Heat transfer vinyl (multiple colors)
- Cutting mat
- Weeding tool
Shirt & Pressing
- Cotton or cotton-blend t-shirt
- Heat press or household iron
- Teflon sheet or parchment paper
Design Files
- Teacher SVG files or designs
- Cricut Design Space access
- Computer or tablet
Step-by-Step Instructions
Upload Your Design
Open Cricut Design Space and upload your chosen teacher SVG file. Resize the design to approximately 10″ wide for adult shirts. Separate different colored elements onto different layers for easier cutting.
Prepare for Cutting
Click “Make” and ensure you mirror each layer (crucial for iron-on vinyl!). Place your heat transfer vinyl on the cutting mat with the liner side down. Select “Everyday Iron On” setting for most brands.
Cut and Weed
Cut each color layer separately. After cutting, carefully weed (remove) the excess vinyl around your design using the weeding tool. Take your time with intricate details to ensure clean lines.
Position and Press
Preheat your shirt briefly, then position your design 2-3″ below the neckline. Place the first layer (liner side up) and press with your heat press at 315°F for 30 seconds, or use a household iron on cotton setting without steam.
Layer and Finish
Add subsequent layers one at a time, covering with a Teflon sheet between each pressing. Once all layers are applied, give a final press of 30 seconds. Allow to cool completely before peeling away the clear liner.

Pro Tips for Perfect Results
- Temperature Control: Always start with lower heat settings and increase if needed. Different vinyl brands may require different temperatures.
- Pressure is Key: Apply firm, even pressure across the entire design. If using a household iron, press for 25-30 seconds per section.
- Test First: Always do a test press on a scrap piece of fabric with your specific vinyl brand to ensure proper adhesion.
- Care Instructions: Turn shirts inside out before washing in cold water, and avoid using fabric softener to preserve the vinyl.
3
DIY Personalized Teacher Coffee Mug

Every teacher deserves a special mug for their well-deserved coffee breaks! This DIY project uses paint markers to create permanent, dishwasher-safe designs that will make your daily caffeine ritual extra special. With four different techniques to choose from, you can create a mug that’s perfectly suited to your style.
Perfect Gift Idea
These personalized mugs make wonderful gifts for fellow teachers, mentor teachers, or even students’ parents. Consider creating a set with matching coordinating SVG designs!
Materials Needed
Core Materials
- White ceramic mugs (washed and dried)
- Paint Sharpies (oil-based markers)
- Rubbing alcohol for cleaning
- Paper towels
Optional Supplies
- Sticker letters for vinyl method
- Printed designs for transfer method
- Pencil for transfer technique
- Tape or washi tape
For Durability
- Krylon Crystal Clear Acrylic Coating
- Oven for baking process
- Protective work surface covering

Four Creative Methods
1
Freehand Method
Best for: Personalized names, inspirational quotes, or simple drawings
Steps:
- Clean mug with rubbing alcohol and let dry completely
- Draw your design directly on the mug with Paint Sharpies
- Wipe any mistakes immediately with rubbing alcohol
- Let dry 24 hours, then bake at 450°F for 30 minutes
- Cool in oven overnight, then spray with acrylic coating
2
Vinyl Letter Method
Best for: Professional-looking text with perfect spacing
Steps:
- Clean mug and apply sticker letters where desired
- Dot around each letter with Paint Sharpies in multiple colors
- Remove stickers to reveal masked letters underneath
- Let dry 24 hours, then bake and seal as above
3
Pencil Transfer Method
Best for: Complex designs, logos, or detailed illustrations
Steps:
- Print your design and shade the back with pencil graphite
- Tape design to mug and trace firmly to transfer
- Remove paper and trace over pencil lines with Paint Sharpie
- Let dry 24 hours, then bake and seal as above
4
Tie-Dye Method
Best for: Artistic, colorful designs with a watercolor effect
Steps:
- Scribble circles of various Paint Sharpie colors on the mug
- Drip one drop of rubbing alcohol onto each color spot
- Watch colors blend and spread; repeat until satisfied
- Clean unwanted areas with alcohol once dry
- Bake at 350°F for 60 minutes, then cool and seal
Essential Tips for Long-Lasting Results
- Drying Time: Always allow 24 hours of drying time before baking. This ensures the paint has fully set.
- Oven Safety: Start with a cold oven and let the mug heat up and cool down gradually to prevent cracking.
- Mug Selection: Inexpensive glazed mugs often work better than expensive ones for paint adhesion.
- Safety First: Avoid placing paint near the rim where your lips will touch the mug.
- Color Expectations: Colors will dull slightly after baking, so choose slightly brighter colors than your final desired result.
Ready to Create Your Teacher Masterpieces?
These three DIY projects are perfect for adding personal touches to your teaching experience while staying within budget. Each project can be completed in just a few hours and will serve you well throughout the school year. Whether you’re welcoming new students, showing your teaching pride, or enjoying a well-deserved coffee break, these handmade creations will bring joy to your daily routine.
Take Your Projects to the Next Level
Looking for professional-quality designs to make your projects even more impressive? Our collection of back-to-school SVG files includes hundreds of teacher-themed designs perfect for all your DIY needs.
Share Your Creations
We’d love to see your finished projects! Share photos of your DIY teacher crafts on social media and tag us to inspire other educators.
Save for Later
Bookmark this page or save it to your Pinterest boards so you can easily find these tutorials when you’re ready to start crafting!
Happy Crafting, Amazing Teachers!
Remember, the best classroom decorations and teacher accessories are the ones made with love and creativity. These projects not only save money but also give you the satisfaction of creating something uniquely yours. Here’s to a fantastic school year filled with personalized touches that make teaching even more rewarding!